


Adobe Photoshop Elements 5.0 A–Z Tools and features illustrated ready reference- P3
lượt xem 32
download
 Download
Vui lòng tải xuống để xem tài liệu đầy đủ
Download
Vui lòng tải xuống để xem tài liệu đầy đủ
Tham khảo tài liệu 'adobe photoshop elements 5.0 a–z tools and features illustrated ready reference- p3', công nghệ thông tin, đồ họa - thiết kế - flash phục vụ nhu cầu học tập, nghiên cứu và làm việc hiệu quả
Bình luận(0) Đăng nhập để gửi bình luận!
Nội dung Text: Adobe Photoshop Elements 5.0 A–Z Tools and features illustrated ready reference- P3
- fF FILTERS Filters Filters palette Find Menu: Editor: Filter Menu: Editor: Window > Styles and Effects Menu: Photo Browser: Find Shortcut: Ctrl/Cmd F (last filter) OS: Mac, Windows Editor: Window > Filters (pre-version 3.0) Shortcut: – OS: Windows See also: Filter Gallery, Shortcut: – OS: Mac, Windows Find All Version Sets, Version: 1, 2, 3, 4, 5 Artwork and Effects See also: Filter Gallery, Version: 3, 4, 5 See also: Find by Details, Version: 1, 2 palette Artwork and Effects palette Find by Visual Similarity Digital filters are based on the traditional The number and type of filters available One of the great benefits of organizing your photographic versions, which are placed can make selecting which to use a difficult pictures in the Photo Browser workspace is in front of the lens of the camera or process. To help with this decision, the huge range of search options that then enlarger to change the way the image is Elements also contains a Filter Browser becomes available to you. captured or printed. Now, with the click type feature that displays thumbnail In fact there are so many search options of a button it is possible to make extremely versions of different filter effects. that Adobe created a new menu heading complex changes to our images almost Before version 3.0 of the program the called ‘Find’ specifically to hold all the instantaneously – changes that a few years F browser was a separate palette (1) and choices. Here you will be able to search for ago we couldn’t even imagine. could be displayed by selecting Window your photos based on a selected date range, The filters in Adobe Photoshop Elements > Filters or clicking on it’s tab in the Palette filename, caption, media type (video, photo, can be found grouped under a series of Dock. audio or creation), history (when an item subheadings based on their main effect With the release of version 3.0 the browser was e-mailed, printed, received, imported, or feature in the Filter menu. became part of the thumbnail previews used in a creation project or even shared Selecting a filter will apply the effect to located in the new Styles and Effects palette online) and even by the predominant color the current layer or selection. Some filters (2). in the photo. display a dialog that allows the user to Double-clicking the filter preview change specific settings and preview the thumbnail will open the Filter Gallery and filtered image before applying the effect apply the filter changes to your picture. to the whole of the picture. This can be a great time saver, as filtering a large file can The selection of filters previewed at any take several minutes. one time can be changed by altering the selection in the pop-up menu at the top of Other filters are incorporated into a Filter the palette. In version 5.0 filters can also be Gallery (Filter > Filter Gallery) feature that found in the Artwork and Effects palette. provides both preview and controls in a single dialog. Filters can also be accessed via the Filter section for the Styles and Effects palette or the new Artwork and Effects palette in version 5.0. Please purchase PDF Split-Merge on www.verypdf.com to remove this watermark. 5.0 A–Z 98 Photoshop Elements
- FIND ALL STACKS fF Find All Stacks Find All Version Sets Find by Details Menu: Organizer: Find > All Stacks Menu: Photo Browser: Find > All Version Sets Shortcut: Shft Ctrl Alt S OS: Windows Shortcut: Ctrl Alt V OS: Windows (Metadata) Stacks, Version Sets, Version: 4, 5 See also: Find, Version Set Menu: Photo Browser: Find > By Details (Metadata) Version: 5 See also: Auto Stacking Shortcut: – OS: Windows The Find > All Version Sets feature (1) is Version: 4, 5 See also: Find To help with the management of the one of two new Find options introduced Organizer workspace a new method for in Elements 4.0 (the other being Find > In a new and very powerful search option searching for files has been added to the By Details (Metadata)). in Elements 4.0 the wealth of information many ways already listed under the Find that is stored with your photo as metadata menu. Using this option it is now possible to isolate can be used as a basis for locating specific just those photos that have been collated in pictures. Now you can quickly locate all the photos Version Sets. The sets located as a result of that have been grouped into stacks by the search are displayed in a new browser The Find > By Details (Metadata) option selecting the All Stacks option (1) from window (2). displays a sophisticated search dialog that F the Find menu. Elements then presents allows you to nominate specific criteria (1) you with a new window (2) containing all If you want to display all the to use when looking within the metadata the stacks that it has located. Clicking the items contained in a set then portion of the picture file. The dialog also Back to All Photos button will redisplay all right-click on the thumbnail provides sections to choose how to match the images in your catalog. and choose Version Set > (2) the search text (Starts with, Ends Reveal Items in Version Set with, Contains, etc.) and a place to insert from the pop-up menu. the search text (3) or value (Filename, After Camera Make, Camera Model, Capture Date, etc.). Beyond simple camera-based metadata you can also use this dialog to search for any Captions, Notes, Tags or Collections that you have applied to your pictures. For more sophisticated search options you can add extra criteria by clicking on the ‘+’ button on the right of the dialog. Alternatively criteria can be removed by clicking the ‘–’ button (4). Please purchase PDF Split-Merge on www.verypdf.com to remove this watermark. www.ElementsA-Z.com 99
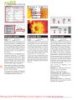
- fF FIND BY VISUAL SIMILARITY Before Before edge sharpening After After edge sharpening Find by Visual Find faces for tagging Menu: Photo Browser: Find > Find Faces for Tagging Similarity Shortcut: – OS: Windows Photo Browser: Find > By Visual Similarity with Selected Version: 4, 5 See also: Tags, Find Menu: Photos Shortcut: – OS: Windows The ability to add tags (keywords) to photos Version: 4, 5 See also: Find in Elements is one of the program’s key The Find > By Visual Similarity (1) with strengths, providing a great way to sort Selected Photos feature is a new search the thousands of images that reside on our option in version 4.0 and replaces the hard drives. Find > By Color Similarity that appeared Many photographers use the Tagging in version 3.0. feature to sort their pictures of people, Find Edges filter adding different tags for each family Both find options use the color and tones of Menu: Editor: Filter > Stylize > Find Edges member or friend featured in the photo. F the currently selected photos (or photo) in Shortcut: – OS: Mac, Windows the Browser workspace as the basis of the Version: 1, 2, 3, 4, 5 See also: Filters Doing this makes the often time- search. Photos that most match the search consuming process of finding photos of The Find Edges filter, as one of the group of a particular person a lot easier as the tags criteria are displayed in a new Browser Stylize filters, searches for and highlights window. The degree of matching is listed can be used as the basis for the search. the edges in a picture. The feature classifies as a percentage value in the bottom left of edges as being picture parts where there In version 4.0 the Adobe engineers have each thumbnail (2). is a major change in tone, color and/or added a new auto feature that speeds up This style of search method is also known contrast. the location of people photos as well as as ‘Pixel-matching’. the process of adding tags. Called Find The feature outlines the edges it locates Faces for Tagging (1), the feature searches with dark lines against a lighter colored through your thumbnails isolating the background. There are no extra controls of faces of people in the photos and then slider adjustments available for this filter. displays these faces in a new special Face The edge-finding ability of this filter is used Tagging window (2). Adding tags is then in the fast sharpening technique at the a simple matter of dragging then from the front of this book. The approach isolates Tags pane (3) onto the faces. the sharpening effects of the Unsharp Mask filter to the edges of a picture. Please purchase PDF Split-Merge on www.verypdf.com to remove this watermark. 5.0 A–Z 100 Photoshop Elements
- FIXED SIZE OPTION fF Fixed Size option Flatten Image Menu: – Menu: Editor: Layer > Flatten Image Shortcut: – OS: Mac, Windows Shortcut: – OS: Mac, Windows See also: Marquee tool, Version: 1, 2, 3, 4, 5 See also: Merge Linked Version: 1, 2, 3, 5 Crop tool The Fixed Size option is available in the The Flatten Image command combines the detail of all visible layers into a single Flipbook options bar of both the marquee (1) and Menu: Organizer: File > Create > Flipbook layer. In the process transparent areas Shortcut: – OS: Windows Crop tools (2). This feature allows you to are filled with white and hidden layers Version: 5 See also: Animated GIFs set the size of the selection or cropping area are discarded. before drawing the shape on the picture’s Flipbooks are a new way of creating small surface. Text, shape and adjustment layers are no animations from a series of individual longer present, after flattening nor are photographs. The results simulate the ‘old The size can be nominated in pixels (px), their contents editable. The file size of the skool’ animation technique where slightly inches (in), centimeters (cm), millimeters flattened picture will be much smaller than different drawings were created on corners F (mm) points, picas or percent. the layered version. To flatten your image of successive pages of a small notebook. Fixed Size is not an Options bar menu select the option from the Layer menu (1) Flipping the pages between thumb and item for the Crop tool in Elements 4.0 but or from the menu that pops out from the forefinger created a sense of motion. is available in version 5.0. More button in the Layers palette (2). The process for creating an Elements As a general rule you should Flipbook is simple. Select the pictures not flatten the layers in to include from those displayed in the Elements documents unless Organizer workspace and then choose File you are absolutely sure that > Create > Flipbook. You can also start the you do not want to edit the process from the editor and it will use open picture further. If you are files. Set the speed in frames per second unsure, make a copy of the layered file and (1), order (2) and output options (3) in the flatten the copy, keeping the original safe Flipbook dialog and then click Output to for editing later. Also, if you have vector create. layers such as text or shapes and want to The resultant WMV (Windows Media print them at the highest quality possible Video) file can be played with any then do not flatten the image. Windows machine with the latest version of Windows Media Player installed. The VCR type controllers allow you to preview the book before outputting. Please purchase PDF Split-Merge on www.verypdf.com to remove this watermark. www.ElementsA-Z.com 101
- fF Before FLIP LAYER HORIZONTAL After Flip Horizontal After Flip Vertical Flip Layer Horizontal Flip Layer Vertical Focus tools Menu: Editor: Image > Rotate > Flip Layer Horizontal Menu: Editor: Image > Rotate > Flip Layer Vertical Menu: – Shortcut: – OS: Mac, Windows Shortcut: – OS: Mac, Windows Shortcut: R OS: Mac, Windows Version: 1, 2, 3, 4 See also: Flip Horizontal Version: 1, 2, 3, 4, 5 See also: Flip Vertical Version: 1, 2, 3, 4, 5 See also: Blur tool, Sharpen tool The Flip Layer Horizontal command The Flip Layer Vertical command rotates The Focus tool group contains the Blur rotates the selected layer from left to right the layer from top to bottom and produces and Sharpen tools. The tools are used like and creates a result similar to a view of a result similar to the view of the layer and a paintbrush but instead of laying down the reflection of the layer contents in a its contents when it was flipped upside color on the canvas the image is blurred mirror. down. (1) or sharpened (2). The Size (brush tip), Mode (blend mode) and Strength settings for the tool are all controlled in the options bar. Before Before F When using these tools most professionals apply repeated low strength strokes to build up the effect rather than a single application using a high strength setting. After Flip Horizontal After Flip Vertical Flip Horizontal Flip Vertical Menu: Editor: Image > Rotate > Flip Horizontal Menu: Editor: Image > Rotate > Flip Vertical Shortcut: - OS: Mac, Windows Shortcut: - OS: Mac, Windows Version: 1, 2, 3, 4, 5 See also: Flip Layer Horizontal Version: 1, 2, 3, 4, 5 See also: Flip Layer Vertical The Flip Horizontal command rotates the The Flip Vertical command rotates the picture (and all its layers) from left to right picture (and all its layers) from top to and creates a result similar to a reflection bottom and produces a result similar to of the photo in a mirror. the view of the picture if it was flipped upside down. Please purchase PDF Split-Merge on www.verypdf.com to remove this watermark. 5.0 A–Z 102 Photoshop Elements
- FOLDER VIEW fF Folder View Font size Font styles and families Menu: – Menu: – Menu: – Shortcut: – OS: Windows Shortcut: – OS: Mac, Windows Shortcut: – OS: Mac, Windows Version: 4 See also: Date view Version: 1, 2, 3, 4, 5 See also: Fonts, selecting Version: 1, 2, 3, 4, 5 See also: Faux fonts Along with both the Date and Import Batch The size of the text you place in your image The font family is a term used to describe views, the thumbnails in the Photo Browser files is measured as pixels, millimeters or the way that the letter shapes look. can be displayed in Folder view. This option points. Most readers would be familiar with shows a folder tree representation of your I find the pixel setting most useful when the difference in appearance between computer on the left side of the Browser working with digital files, as it indicates to Arial and Times Roman. These are two workspace. Change to this viewing mode me the precise size of my text in relationship different families each containing different by selecting the Folder Location entry from to the whole image. Millimeter and points characteristics that determine the way the drop-down menu at the bottom left values, on the other hand, vary depending that the letter shapes appear (1). of the workspace (1). Whilst in this mode on the resolution of the picture and the The font style refers to the different versions F clicking on a thumbnail will automatic- resolution of the output device. of the same font family. Most fonts are ally reveal the folder where the photo is available in regular, italic, bold and bold stored (2). Some of you might be aware that 72 points approximately equals 1 inch, but this is italic styles (2). only true if the picture’s resolution is 72 Both font characteristics, family and style, dpi. At higher resolutions the pixels are can be altered via the items on the type packed more closely together and therefore options bar. the same 72 point type is smaller in size. You can download new fonts from To change the units of measurement used specialist websites to add to your system. for type, go to the Units & Rulers option After downloading, the fonts should be in the Preferences menu and then select installed into the Fonts section of your the Type measure unit you want from the system directory. Windows and Macintosh drop-down type menu (1). users will need to consult their operating To set the size of your font before adding system manuals to find the preferred the text to the picture input the value in the method for installing new fonts on their Font Size section of the options bar. computer. Fonts, selecting To change font size of existing type select Menu: - the type and then alter the font size Shortcut: - OS: Mac, Windows value. See also: Font size, Font styles and Version: 1, 2, 3, 4, 5 families You can select the typeface or font family in one of two ways: by choosing the family along with other type characteristics in the options bar, before adding the text to the picture, or alternatively you can select the existing text and then choose a different typeface (1) (above). Please purchase PDF Split-Merge on www.verypdf.com to remove this watermark. www.ElementsA-Z.com 103
- fF FONTS WYSIWYG Fonts WYSIWYG Menu: – Shortcut: – OS: Windows Version: 4, 5 See also: - New for version 4.0 is the WYSIWYG (What You See Is What You Get) preview that is displayed on the Text tool font menu. Now you can see an example of how the letter shapes for each font family appear right in the menu itself. You can change the size of the font preview in the Type Preferences (Preferences > Type > Font Preview Size). The default is Medium. Fragment filter Frame and photo Menu: Editor: Filter > Pixelate > Fragment Shortcut: – OS: Mac, Windows editing Version: 1, 2, 3, 4, 5 See also: Filters Menu: – Shortcut: – OS: Windows The Fragment filter, as one of the group Version: 5 See also: Frame layers of Pixelate filters, breaks the picture into smaller sections and slightly offsets these To move the picture and frame combination parts. The change is often very subtle and to a new position on the canvas just click- only obvious at high magnification or drag the combination. The size and when applied to a low resolution file. There orientation of the Frame/Picture can be are no extra controls for altering the look altered by clicking on the picture and frame or strength of the effect. first, to select it, and then using the corner, edge and rotate handles to scale or pivot. F Click on the Commit button (green tick) at the bottom of the selected picture to apply the changes. To disregard the changes click the Cancel button (red circle with diagonal line through it) instead. These options are available via the right- Foreground color click menu when the Move tool is selected: Menu: – Shortcut: – OS: Mac, Windows Rotate 90° Right or Left – Pivot the frame Version: 1, 2, 3, 4, 5 See also: Background color and picture by a set amount. Photoshop Elements bases many of its Position Photo in Frame – Switch drawing, painting and filter effects on two colors – the foreground and background Frame, select a to Picture Select mode to allow photo editing. Menu: Editor: File > Print Multiple Photos colors. The currently selected foreground Shortcut: Alt Ctrl P OS: Windows Fit Frame to Photo – Automatically and background colors are shown at Version: 3, 4, 5 See also: Print adjust the frame size to accommodate the the bottom of the toolbox as two colored dimensions and format of the photo. One of the features of the Print Multiple swatches. The topmost swatch (1) Photos option introduced in Elements Replace Photo – Displays a dialog where represents the foreground color, the one 3.0 is the ability to add a frame to your you can select a photo for the frame. beneath (2) the hue for the background. picture before printing. Elements ships Clear Photo – Removes the photo but keeps The default for these colors is black and with a range of pre-made frames that can the frame. white but it is possible to customize the be added, automatically sized and rotated selections at any time. Double-click the directly from the Print Photos dialog. Clear Frame – Removes the frame but swatch and then select a new color from keeps the photo. Simply select the picture to print and then the color picker window (5). Bring to Front/Bring Forward – Moves choose the Print Multiple Photos (even if it To switch foreground and background is only one image) to open the dialog. After the frame and photo up the layer stack. colors click the double-headed curved setting the print options select the frame Send to Back/Send Backward – Moves arrow at the top right (3) and to restore from the list provided before pressing Print. the frame and photo down the layer stack. the default (black and white) click the mini Frames are only available for the Picture Edit Text – Switches text layers to the Edit swatches bottom left (4). Package and Label options. mode. Please purchase PDF Split-Merge on www.verypdf.com to remove this watermark. 5.0 A–Z 104 Photoshop Elements
- FRAME LAYERS fF Frame layers Frame From Video Frames – adjusting Menu: – Shortcut: – OS: Windows command images in Version: 5 See also: Frame and photo editing Menu: Editor: File > Import > Frame From Video Menu: – Shortcut: – OS: Mac, Windows Shortcut: – OS: Windows In Elements 5.0 Adobe introduces a new Version: 2, 3, 4, 5 See also: - Version: 5 See also: Frame layers layer type to coincide with its Photo Layout creation project. Called the Frame layer, With more and more still digital cameras Double-clicking (with the Move tool its role is to store both the frame and the providing movie options it is no wonder selected)or choosing the Position Photo picture that sits within it. In Frame layers that Adobe included a feature that enables in Frame option from the right-click menu both the component parts remain as you to grab frames of your favorite video. selects the photo and displays a marquee separate individual images despite being Called the Frame From Video feature, the around the picture. A small control panel stored as one layer. What does this mean in option allows you to review your footage is also displayed at the top of the marquee day-to-day editing? Well it means that you and select specific still frames to send to (1). F can do things like change the size, shape Elements. To move the position of the photo in the and orientation of either the frame, or the To make photos from your own video frame simply click-drag on the image, picture, independently of each other. start by selecting the feature from the releasing the mouse button when the Frame layers appear like a standard image File > Import menu or from the Camera picture is correctly placed. layer except they have a small plus sign or Scanner button in the Mac Welcome You can alter the size of the photo within in the bottom right-hand corner of the Screen. the frame by moving the Scale slider (in layer thumbnail to distinguish them from When the Frame From Video dialog appears the control panel) or by dragging one of other layer types (1). Like text and shape click the Browse option to search for and the handles of the marquee. layers, Frame layers are also resolution locate your movie files. If the videos are Moving a corner handle will scale the independent. stored in the AVI, MPEG or WMV formats photo proportionately, whereas dragging The upside of this characteristic is that you should be able to display the first frame a side handle will squish or stretch the the frame and photo content can be up- of the movie as a thumbnail. This will make image. or downsized many times with minimal the task of selection easier. Click on the file The picture can be rotated in 90 degree or no damage to picture components. This and select the Open button. increments (to the left) by clicking the is not the case for a standard image layer Using the VCR buttons (play, forward, rotate button in the control panel. where such changes over time cause the reverse, stop and pause) at the bottom of the Alternatively, you can rotate the image to photo to become less clear. The downside dialog play the video to locate the sections any angle using the rotate handle (middle is that because of this basic structure you that contain the images you want. of the bottom edge of the marquee) or by cannot edit or enhance the pixels in a Click the Grab Frame button to capture click-dragging the cursor outside the Frame layer directly. Any attempt to adjust the video frame as a still image (1) and boundaries of the marquee. brightness, color, contrast or even filter the then pass it to the Elements workspace. photo or the frame meets with a warning The photo can be replaced with a new Alternatively you can use the slider control picture by clicking the Replace button in dialog that states that you must Simplify to move through the video sequence, the Frame layer first. Simplifying the layer the control panel and then selecting the stopping to ‘Grab’ as you go. Once you are new picture from the file dialog that is means converting it from its resolution happy with your selection(s) click Done. independent ‘frame plus photo’ state to a displayed. standard pixel-based image layer (2). Please purchase PDF Split-Merge on www.verypdf.com to remove this watermark. www.ElementsA-Z.com 105
- fF FREE ROTATE LAYER Freehand selection Menu: – Shortcut: L OS: Mac, Windows Version: 1, 2, 3, 4, 5 See also: Lasso Freehand selection is another term for the style of selection created with the Lasso tool, as the effectiveness and accuracy of the selection is largely dependent on the drawing (mouse moving) abilities of the Free Rotate Layer Free Transform user. Menu: Editor: Image > Rotate > Free Rotate Layer It was for this reason that Adobe developed Shortcut: – OS: Mac, Windows command the Magnetic Lasso, which is designed to Version: 1, 2, 3, 4, 5 See also: Rotate Menu: Editor: Image > Transform > Free Transform stick to the edges of picture parts as you Shortcut: Ctrl/Cmd T OS: Mac, Windows The Free Rotate Layer option allows you Version: 1, 2, 3, 4, 5 See also: Distort, Perspective, Skew draw. to spin the contents of a layer around a Professionals whose work regularly pivot point. After selecting the command The Image > Transform menu contains requires them to make freehand selections a bounding box surrounds the layer and four options that allow you to change the often use a Stylus and Graphics tablet as the mouse pointer changes to a curved shape of your pictures from their standard they find the approach more natural and arrow to indicate that it is in Rotate mode. rectangle format. The Free Transform more akin to drawing with a pencil. When you click-drag the mouse the layer feature is one of these options but unlike rotates (1). the others, which tend to only allow one style of change, Free Transform can be By default the pivot point is in the center of F used to scale, rotate, distort, skew or even the layer, but you can select a new position apply a perspective change to your picture. for this point by clicking onto one of the After selecting the feature you may be corner or side boxes in the reference point prompted to change the background to a diagram (2) in the options bar. standard layer ready for transformation. Click Yes in this dialog. Use the following key stroke combinations to change the shape of your layer: Scale – Click-drag any of the bounding box handles. To scale proportionately hold the Shift key down whilst dragging. Rotate – Move the mouse pointer outside Full Screen view Menu: Photo Browser: View > View Photos in Full Screen the bounding box and click-drag to Shortcut: F11 OS: Windows rotate. Version: 4, 5 See also: – Distort – Ctrl/Cmd-click-drag a bounding Starting life as the Photo Review feature in box handle to distort. version 3.0, the View Photos in Full Screen Skew – Shft-Ctrl/Cmd-click-drag a option provides an instant slide show of bounding box handle to skew. the files that you have currently displayed Perspective – Ctrl/Cmd-Alt/Opt-Shft- in the Photo Browser. With the provided click-drag to apply perspective changes. controls you can play, pause or advance to next or last photos, enlarge or reduce When completed either double-click on the size of the picture, automatically the transformed layer or press the Enter enhance, add and remove tags, mark the key to ‘commit’ the changes. To cancel files for printing and add the file to a chosen press the Esc key. collection. Specific picture properties such You cannot apply Distort or Perspective as tag, history and metadata are available to Type layers. by hitting the Alt + Enter keys to display the Properties window. Please purchase PDF Split-Merge on www.verypdf.com to remove this watermark. 5.0 A–Z 106 Photoshop Elements
- GAUSSIAN BLUR FILTER gG gG ABCDEFGHIJKLMNOPQRSTU- VWXYZABCDEFGHIJKLM- NOPQRSTUVWXYZABCDEFGHIJKLMNOPQRSTUVWX- Gaussian Blur filter Get Photos YZABCDEFGHIJKLMNOPQRSTUV Menu: Editor: Filter > Blur > Gaussian Blur Menu: Photo Browser: File > Get Photos WXYZABCDEFGHIJKLMNOPQRSTUVWXYZA- Shortcut: – OS: Mac, Windows Version: 1, 2, 3, 4, 5 See also: Blur Shortcut: Shft Ctrl G Version: 3, 4, 5 OS: Windows See also: Open BCDEFGHIJKLMNOPQRSTUVWX- The Gaussian Blur filter, as one of the The Organizer, in Photo Browser view, YZABCDEFGHIJKLMNOPQRSTU- group of Blur filters, softens the look of creates the thumbnails that it displays photos, producing a blur effect that is during the process of adding your VWXYZABCDEFGHIJKLMNOPQR similar to out of focus pictures. photographs to a collection. Adding your STUVWXYZABCDEFGHIJKLM- This filter is often used to blur the photos to a collection starts with the Get background of photographs, producing Photos command and includes a range of NOPQRSTUVWXYZABCDEFGHI- options for the source of these pictures. an artificial shallow Depth of Field effect. JKLMNOPQRSTUVWXYZABCDEF- To reproduce these results select the area to To start your first collection simply select GHIJKLMNOPQRSTUVWXYZABCDEFGHIJKLMN be blurred first and then apply the filter. the View and Organize option from the Unlike the Blur and Blur More options, Welcome Screen and then proceed to the OPQRSTUVWXYZABCDEFGHI- File > Get Photos menu option. Select one G the Gaussian Blur filter provides a slider JKLMNOPQRSTUVWXYZABCDEF- control that governs the strength of the of the listed sources of pictures provided effect (1). and follow the steps and prompts in the Get Photo sources: GHIJKLMNOPQRSTUVWXYZABC- DEFGHIJKLMNOPQRSTUVWXYZABCDEFGHIJ dialogs that follow. Camera or Card Reader KLMNOPQRSTUVWXYZABCDEFGHIJKLMNOPQRSTU- Mobile Phone Searching This will probably be the most frequently It is no surprise given the availability of The Get Photos > By Searching option V W X Y Z A B Cyour images toJenterM - used route for D E F G H I K L the phone-cameras that Adobe has seen fit to provides a speedy way to locate all the Elements program. NOPQRSTUVWXYZABCDEFGHI- include a new Get Photos > From Mobile folders connected to your computer that Here you can make use of the Adobe Phone option in Elements 3.0. contain pictures that you may want to JKLMNOPQRSTUVWXYZABCDEF- Photo Downloader dialog to transfer and The option does not link your computer add to your Photo Browser catalogs. catalog picture files from your camera or directly to your mobile phone, you will GHIJKLMNOPQRSTUVWXYZABC- memory card (in a reader) to your need the software that came with the unit PhotoDeluxe and DEFGHIJKLMNOPQRSTUVWXYZABCDEFGH- computer. for that, but rather watches the default ActiveShare Albums folder where your phone pictures are Users of both PhotoDeluxe and Scanner IJKLMNOPQRSTUVWXYZABCDE- downloaded and automatically catalogs ActiveShare products can incorporate the The Get Photos > From Scanner option pictures stored here. contents of the Albums created with FGHIJKLMNOPQRSTUVWXYZAB- enables users to obtain images directly these programs into their Elements Photo CDEFGHIJKLMNOPQRSTUVWX- from the scanners they have connected Online Sharing Service Browser. to their computers. After a simple, and free, sign-up procedure After selecting the appropriate option YZABCDEFGHIJKLMNOPQRSTU- users can upload web-friendly copies of from the Get Photos menu, Elements will Files and Folders pictures directly to a sharing and print V W X Y Z A B likeD E F G > Open option Acting much C the File H I J K L M - service hosted by www.ofoto.com. Once locate and list the albums found in the folder you are searching. common to most programs this selection stored online the files can be shared with provides a familiar window that allows friends and relatives. This Get Photos option Once selected the images are then you to search for and catalog photos that provides access to these online sharing files imported into the Photo Browser and are already on your computer or on CDs, . organized automatically according to data DVDs, or external hard drives. date. Please purchase PDF Split-Merge on www.verypdf.com to remove this watermark. www.ElementsA-Z.com 107
- gG GENERAL FIXES (QUICK FIX) GIF format Menu: – Shortcut: – OS: Mac, Windows Version: 1, 2, 3, 4, 5 See also: JPEG, Save for Web The GIF format is used to optimize logos and graphics for use on web pages. The format supports up to 256 colors (8-bit), transparency (2), LZW compression and simple animation. When converting a full color picture to GIF the number of colors is reduced and mixed using one of four options – Selective, Perceptual, Adaptive and Restrictive or Web (1). The Dither option (4) helps simulate continuous tone by mixing patterns of dots. The total number of colors (3) used in the final file can also be set in the dialog. Save images in the GIF format by selecting the GIF option in the Save for General Fixes (Quick Fix) Web feature (1) or via the Compuserve GIF Menu: – Shortcut: – OS: Mac, Windows format option in the Save As option. Version: 3, 4, 5 See also: Standard Editor, Lighting The Quick Fix Editor is home for many of the automatic GIF – Selective or ‘quick and easy’ enhancement tools. You can access and apply the features via the menu system or take advantage of the controls displayed in the Palette Bin G (1). The controls include: General Fixes – Smart Fix and Red Eye Fix. Lighting – Levels, Contrast, Shadows/Highlights/ GIF – Adaptive Midtone Contrast. Color – Saturation, Hue, Temperature, Tint. Sharpen – Sharpen amount. For most controls you can let the program apply the changes for you by pressing the Auto button, or you can take control of the changes you apply by using the slider control. GIF – Perceptual Also included in the Quick Fix dialog are several tools grouped in a toolbar (2) to the left. These are the Zoom, Move and Crop tools as well as the Red Eye, Magic Selection and Selection Brushes. GIF – Restrictive (Web) Please purchase PDF Split-Merge on www.verypdf.com to remove this watermark. 5.0 A–Z 108 Photoshop Elements
- GLOWING EDGES FILTER gG Before After Glowing Edges filter Gradient Editor Gradient Map Menu: Editor: Filter > Stylize > Glowing Edges Menu: – Shortcut: – OS: Mac, Windows Shortcut: G OS: Mac, Windows adjustment layer Version: 1, 2, 3, 4, 5 See also: – Version: 1, 2, 3, 4, 5 See also: Gradients Menu: Editor: Layer > New Adjustment Layer > Gradient Map Shortcut: – OS: Mac, Windows The Glowing Edges filter, as one of the The Gradient Editor dialog is used to adjust Version: 1, 2, 3, 4, 5 See also: Gradient Map filter, Gradients group of Stylize filters, searches for and the existing gradient options found in the draws neon-like colored lines around the Gradient Picker palette or create and save The Gradient Map adjustment layer works edges of picture elements. completely new choices to the feature. in a similar way to the Gradient Map filter in that it swaps the tone of the picture with The edges in the picture are used as the To create a new gradient start by displaying the colors of the selected gradient. basis for the effect, with the three settings the dialog by clicking the Edit button in in the dialog providing control over how the Gradient options bar. Select a preset Applying the changes via an adjustment these are located and the style of the drawn option (1) to base the new gradient upon. layer means that the results are always neon line. Change colors by double-clicking the color editable later and the original photograph stop (5) and choosing a new color from the remains untouched. By double-clicking The Edge Width slider (1) alters the size and the layer thumbnail (left side) the Gradient Color Picker dialog. Alter the new color’s G dominance of the lines drawn around the Map dialog opens and displays the original edges. The Edge Brightness slider (2) alters position in the gradient by click-dragging the stop. settings that were used in the adjustment the brightness of the lines and the balance layer. These settings can be altered and the of light and dark in the picture, and the Adjust the position of the opacity by click- adjustment layer reapplied. Smoothness slider (3) adjusts the amount dragging the opacity stops (2, 3) along the of fine detail in the end result. gradient. Change the midpoint of color or The Gradient Map feature in either the filter opacity by click-dragging the midpoint or adjustment layer form is often used to control (4). create a custom conversion of a color image to grayscale. By selecting a simple black to To add new color or opacity stops click on white gradient (1) in the feature the tones the upper or lower side of the gradient. To in the original image are mapped evenly delete existing stops drag them into the to the grayscale gradient. middle of the gradient. Save the finished gradient by entering a name and pressing the New button. The gradient will be displayed as a new option in the Gradient Picker palette. Please purchase PDF Split-Merge on www.verypdf.com to remove this watermark. www.ElementsA-Z.com 109
- gG GRADIENT MAP FILTER Linear Gradients Diamond Gradient Map filter Menu: – Shortcut: G OS: Mac, Windows Menu: Editor: Filter > Adjustment > Gradient Map Version: 1, 2, 3, 4, 5 See also: Gradient Editor Shortcut: – OS: Mac, Windows See also: Gradients, Gradient Map Version: 1, 2, 3, 4, 5 adjustment layer Photoshop Elements has five different gradient types. All the options gradually The Gradient Map filter, as one of the change color and tone from one point in group of Adjustment filters, converts the the picture to another. The choices are: underlying tones (grayscale information) Linear (1) – Changes color from starting of the photo to the colors and tones of the to end point in a straight line. selected gradient. The dialog contains options for selecting the gradient to use Radial (2) – Radiates the gradient from the Reflected as the basis of the mapping (1) as well as center outwards in a circular form. two check box controls. Angle gradient (3) – Changes the color Dither – For applying a Dither to the in a counter-clockwise direction around G gradient to help smooth out changes in the starting point. color and tone. Reflection (4) – Mirrors a linear gradient Reverse – Switches the mapping process on either side of the drawn line. so that dark tones are converted to light Diamond (5) – Changes color from the tones and light tones to dark. center outwards in a diamond shape. To create a gradient start by selecting the tool and then adjusting the controls in the Radial options palette. Choose the colors from the Gradient Picker drop-down menu (6) and the style from the five buttons to the right (1–5). Click-drag the mouse pointer on the canvas surface to stretch out a line that marks the start and end points of the gradient. Release the button to fill the layer with the selected gradient. For a longer transition of tones drag a longer line – it can extend beyond the canvas; for Angle a more abrupt transition drag a shorter line. Please purchase PDF Split-Merge on www.verypdf.com to remove this watermark. 5.0 A–Z 110 Photoshop Elements
- GRAIN FILTER gG Grain filter Graphic Pen filter Graphics Tablet Menu: Editor: Filter > Texture > Grain Menu: Editor: Filter > Sketch > Graphic Pen Menu: – Shortcut: – OS: Mac, Windows Shortcut: – OS: Mac, Windows Shortcut: – OS: Mac, Windows Version: 1, 2, 3, 4, 5 See also: Filters, Film Grain Version: 1, 2, 3, 4, 5 See also: Filters Version: 1, 2, 3, 4, 5 See also: – The Grain filter, as one of the group of The Graphic Pen filter is one of the group Many professionals prefer to work with a Texture filters, simulates the look of the of Sketch filters. The feature simulates stylus and tablet when creating complex grain of high-speed film. the effect of making a drawing of the masks. The extra options provided by the The look of the effect is adjusted by three photograph with a thin graphic arts pen. pressure sensitivity of the stylus along settings in the dialog. The Intensity slider Close overlapping strokes are used for the with the familiar ‘pencil and paper’ feeling (1) alters the density of the grain effect shadow areas, midtones are represented makes using this approach more intuitive and the Contrast slider (2) adjusts the by balancing strokes with the paper color and often faster than using a mouse. underlying contrast of the whole picture. showing through, and highlight details Most drawing and painting tools as well as The Grain Type menu provides a variety are drawn with a few sparse strokes. The the Magnetic Lasso in Photoshop Elements of texture options that can be used for filter uses the current foreground color to have a Tablet Options (1) section on their filtering. Film grain or Regular is one of draw the lines. The dialog gives you control options bar which contains a range of G the entries but the look of the end result over the balance of light and dark – paper settings that can be activated to function differs greatly with different selections. and stroke (2) and the length of the pen with the stylus or pen pressure. stroke (1) used to draw the picture. There With some grain types the current is also a drop-down menu for selecting the foreground and background colors are direction of the pen strokes (3). used for the grain and background hues. Changing these colors often results in dramatically different results. Please purchase PDF Split-Merge on www.verypdf.com to remove this watermark. www.ElementsA-Z.com 111
- gG GRAYSCALE IMAGES Before Grayscale Monochrome After © www.ablestock.com 2005 Grayscale images Grayscale mode Grid Menu: – Menu: Editor: Image > Mode > Grayscale Menu: Editor: View > Grid Shortcut: – OS: Mac, Windows Shortcut: – OS: Mac, Windows Shortcut: – OS: Mac, Windows Version: 1, 2, 3, 4, 5 See also: – Version: 1, 2, 3, 4, 5 See also: Color modes Version: 1, 2, 3, 4 See also: Rulers Grayscale images, in computer terms, are It is possible to change the color mode of The Grid is available in both the Quick Fix those photos that contain no color. These your picture by selecting a different mode and Standard editing spaces. With the pictures contain a series of gray tones from from the Image > Mode menu (1). grid displayed and the Snap to Grid option pure black through to white. The more A picture that is in Grayscale mode (View > Snap to Grid) selected objects will tones that exist between the black and contains no color at all and supports a total automatically align with grid lines and white points the smoother any graduations of 256 levels of gray, with a value of 0 being intersections when being moved or sized. in the picture will be. The photographic black and 256 being white. The grid is often used in conjunction with equivalent of a grayscale picture is a black the Rulers (View > Rulers) feature to help and white photograph. When converting a color photograph to Grayscale mode in Elements 3.0 you may align and size objects and picture parts. Sometimes the term monochrome is used need to confirm that you wish to lose all The color, style and spacing of the grid can to describe grayscale photos because G the color in the photo. Clicking OK to this be adjusted via the Grid section of the Edit they only contain a single (mono) color request will lose the picture’s three color > Preferences dialog (Windows) or the (chrome) – black on a white background. channels (RGB) and retain tone and detail Photoshop Elements > Preferences dialog However, monochrome can also refer to in a single gray channel (2). (Mac) (1). photos that use a color other than black for the tones. Please purchase PDF Split-Merge on www.verypdf.com to remove this watermark. 5.0 A–Z 112 Photoshop Elements
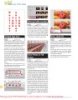
- Before HALFTONE PATTERN FILTER hH Before © www.ablestock.com 2005 After After Group with Previous Grow, selection hH ABCDEFGHIJKLMNOPQRSTU- VWXYZABCDEFGHIJKLM- NOPQRSTUVWXYZABCDEFGHIJKLMNOPQRSTUVWX- Menu: Editor: Select > Grow YZABCDEFGHIJKLMNOPQRSTUV command Shortcut: – OS: Mac, Windows WXYZABCDEFGHIJKLMNOPQRSTUVWXYZA- Menu: Editor: Layer > Group with Previous Version: 1, 2, 3, 4, 5 See also: Expand, Contract Shortcut: Ctrl/Cmd G OS: Mac, Windows Version: 1, 2, 3, 4, 5 See also: Layers As well as the options listed under the BCDEFGHIJKLMNOPQRSTUVWX- The Group with Previous command Select > Modify menu, an active selection YZABCDEFGHIJKLMNOPQRSTU- can also be altered and adjusted using the combines the contents of two layers using Grow and Similar commands. VWXYZABCDEFGHIJKLMNOPQR a clipping group. The feature is often used STUVWXYZABCDEFGHIJKLM- to insert the contents of one layer into the The Select > Grow feature increases the size non-transparent areas of another. The of an existing selection by incorporating NOPQRSTUVWXYZABCDEFGHI- example shows the winter image, top layer, pixels of similar color and tone to those being clipped by the letter shapes (non- already in the selection. For a pixel to be JKLMNOPQRSTUVWXYZABCDEF- transparent areas) of the bottom layer. included in the ‘grown’ selection it must GHIJKLMNOPQRSTUVWXYZABCDEFGHIJKLMN be adjacent to the existing selection and This occurs because all the layers in the fall within the current Tolerance settings OPQRSTUVWXYZABCDEFGHI- clipping group have the opacity attributes located in the options bar (1). and blend mode of the bottom-most JKLMNOPQRSTUVWXYZABCDEF- H layer. Halftone Pattern filter GHIJKLMNOPQRSTUVWXYZABC- You can create a clipping group in three different ways: DEFGHIJKLMNOPQRSTUVWXYZABCDEFGHIJ Menu: Editor: Filter > Sketch > Halftone Pattern Shortcut: – OS: Mac, Windows 1. Select the top layer and then choose KLMNOPQRSTUVWXYZABCDEFGHIJKLMNOPQRSTU- Version: 1, 2, 3, 4, 5 See also: Filters, Color Halftone Layer > Group with Previous. V W Halftone PatternEfiF G as Ione oflook - The X Y Z A B C D lter, H J K L the group of Sketch filters, simulates the M 2. Link the layers using the Chain icon in NOPQRSTUVWXYZABCDEFGHI- of a picture that has been printed using the Layers palette and then select Layer > a halftone or screened pattern. The filter Group Linked (version 1.0, 2.0, 3.0). JKLMNOPQRSTUVWXYZABCDEF- provides similar looking results to the Color 3. Hold down the Alt/Opt key whilst you GHIJKLMNOPQRSTUVWXYZABC- Halftone feature except here the pattern is click on the boundaries between the two created in monochrome and is based on layers that you wish to group. The cursor DEFGHIJKLMNOPQRSTUVWXYZABCDEFGH- the current foreground and background changes to overlapping circles when it is IJKLMNOPQRSTUVWXYZABCDE- colors. Another difference is that the filter over the boundary. contains a preview window and the ability FGHIJKLMNOPQRSTUVWXYZAB- to change the pattern type (3). CDEFGHIJKLMNOPQRSTUVWX- The size of the pattern element (1), dot or YZABCDEFGHIJKLMNOPQRSTU- line, and the overall contrast of the effect (2) is controlled by the sliders in the dialog. V WpatternA B C Dbe switchedJbetween - The X Y Z type can E F G H I K L M dot, line or circle options. Please purchase PDF Split-Merge on www.verypdf.com to remove this watermark. www.ElementsA-Z.com 113
- hH HAND TOOL Before After Hand tool Hardness option Hard Light blending Menu: – Shortcut: H OS: Mac, Windows Menu: – Shortcut: B OS: Mac, Windows mode Version: 1, 2, 3, 4, 5 See also: Move Version: 1, 2, 3, 4, 5 See also: Brush Menu: – Shortcut: – OS: Mac, Windows The Hand tool helps users navigate their Hardness (4) is one of the options from the Version: 1, 2, 3, 4 See also: Blending modes way around images. Additional Brush Options palette which is displayed when the More Options button The Hard Light blending mode is one of This is especially helpful when the image is pressed. The slider control adjusts the the group of Overlay modes that base has been ‘zoomed’ beyond the confines softness of the edge of the brush tip. A their effects on combining the two layers of the screen. When a picture is enlarged setting of 100% (1) produces a sharp-edged depending on the tonal value of their to this extent it is not possible to view the brush stroke, 50% moderately soft (2) and contents. whole image at one time; using the Hand tool the user can drag the photograph 1% a very soft brush stroke (3). This option is similar to the Overlay around within the window frame. mode but produces a more dramatic and sometimes more contrasty result. The You can invoke the Hand tool content of the top layer is either Screened or at any time by pressing the Multiplied depending on its color and tonal Spacebar (except when using value. If the tone in the top layer is lighter H the Type tool). than 50% then this section of the bottom layer is screened (lightened); if the tone is darker, then it is multiplied (darkened). Blending with 50% gray produces no change. When combined with the High Pass filter this blend mode is used to create editable sharpening effects that don’t use any of the sharpening filters. Please purchase PDF Split-Merge on www.verypdf.com to remove this watermark. 5.0 A–Z 114 Photoshop Elements
- HARD MIX BLENDING MODE Before hH Before After After Hard Mix blending Help Healing Brush tool Editor: Help > Photoshop Elements Help mode Menu: Photo Browser: Help > Photoshop Elements Help Menu: – Shortcut: J OS: Mac, Windows Menu: – Shortcut: F1 OS: Mac, Windows Version: 3, 4, 5 See also: Spot Healing Brush Shortcut: – OS: Mac, Windows Version: 3, 4, 5 See also: Hints, Context Help Version: 1, 2, 3, 4, 5 See also: Blending modes The Healing Brush is designed to work The completely revised Photoshop Elements in a similar way to the Clone tool; the The Hard Mix blending mode is one of Help system provides a variety of ways to user selects the area (Alt/Option-click) the group of Overlay modes that base present you with the knowledge you need. to be sampled before painting and then their effects on combining the two layers The Help window contains Contents, Index proceeds to drag the brush tip over the depending on the tonal value of their and Glossary tabs, buttons for navigating area to be repaired. contents. backwards and forwards through Help topics, displaying the Help’s home page and The tool achieves such great results by This option is similar to the Overlay mode merging background and source area but produces a more dramatic, contrasty printing Help topics and a place to search for all entries on a specific topic. details as you paint. Just as with the Clone and posterized result. The luminosity of the Stamp tool, the size and edge hardness top layer is combined with the color of the The window lists the Help topics on the of the current brush determines the bottom to produce a picture with large flat left and the contents of the selected entry characteristics of the Healing Brush tool areas of dramatic color (maximum colors on the right. H tip (1). 8). Lowering the opacity of the top layer You can access the new Help center by (Hard Mix layer) reduces the posterization One of the best ways to demonstrate the selecting Photoshop Elements’ Help option sheer power of the Healing Brush is to effects. Blending with 50% gray produces from the Help menu, entering a search no change. remove the wrinkles from an aged face. item in the space on the shortcuts bar or In the example, the deep crevices of the The Hard Mix option can be used to add pressing the Help button also located here, fisherman’s face have been easily removed a high contrast sharpening effect to a clicking the links in Tool tips or clicking with the tool. The texture, color and tone picture. Blur a duplicate layer of the original Help buttons in dialog boxes, and via of the face remain even after the ‘healing’ and then change to Hard Mix and adjust Context menus and Palette menus. work is completed because the tool merges the layer’s opacity to control the degree of the new areas with the detail of the picture contrast and sharpening. beneath. Please purchase PDF Split-Merge on www.verypdf.com to remove this watermark. www.ElementsA-Z.com 115
- hH HIDING PALETTES Shown Text layer shown © www.ablestock.com 2005 Hidden Text layer hidden Hiding palettes Hiding/Showing layers High Pass filter Menu: – Menu: Editor: Window > Layers Menu: Editor: Filter > Other > High Pass Shortcut: Tab OS: Mac, Windows Shortcut: – OS: Mac, Windows Shortcut: – OS: Mac, Windows Version: 1, 2, 3, 4, 5 See also: Palette Bin Version: 1, 2, 3, 4, 5 See also: Layers Version: 1, 2, 3, 4, 5 See also: Filters Open palettes can be hidden and re- The Photoshop Elements Layers palette The High Pass filter, as one of the group of displayed by pressing the Tab key (1). displays all the layers in your picture Other filters, isolates the edges in a picture To close the palette altogether click the and their settings in the one dialog box. and then converts the rest of the picture to red ‘X’ in the top right corner of the Layers can be turned off by clicking the mid gray. The filter locates the edge areas palette window. Alternatively palettes Eye symbol on the far left of the layer so by searching for areas of high contrast or open in the workspace can be dragged to that it is no longer displayed. This action color change. the Palette Bin, which can be shown or removes the layer from view but not from The filter contains a single slider, Radius hidden by clicking or dragging on the Bin’s the stack. You can turn the layer back on (1), that controls the filtering effect. When boundary (resize bar) . again by clicking the eye space. You can the Radius value is set to low only the most Alt/Option-click on an eyeball icon to show prominent edge detail is retained and the all layers or just that layer. remainder of the picture converted to gray. Higher values produce a result with less of H the picture converted to gray. The combination filter effects of edge finding and changing picture parts to gray make this feature a tool that is often used for advanced sharpening techniques like the one detailed in the fast techniques section at the front of this book. Please purchase PDF Split-Merge on www.verypdf.com to remove this watermark. 5.0 A–Z 116 Photoshop Elements
- hH HINTS Hints Hints palette Histogram Menu: Window > Hints (ver.2.0) Menu: Window > Hints Menu: Editor: Window > Histogram Shortcut: – OS: Mac, Windows Shortcut: – OS: Mac, Windows Shortcut: – OS: Mac, Windows Version: 1, 2, 3, 4, 5 See also: How To, Recipes Version: 1, 2 See also: Hints Version: 1, 2, 3, 4, 5 See also: Levels The Hints feature provides instant In developing Elements Adobe has designed The first step in taking charge of your descriptions and help for the tool or feature a range of learning aids that can help you pixels is to become aware of where they that you are currently using. increase your skills and understanding of are situated in your image and how they In versions 1.0 and 2.0 of the program the the program. are distributed between black and white Hint details were displayed in a special One such feature is the Hints palette, which points. Hints palette. The palette was located in is located in the Palette Well or under the The Histogram palette displays a graph of the Palette Well or under the Window Window menu. When open this window all the pixels in your image. The left-hand menu. shows information about the tool or menu side represents the black values (1), the In version 3.0 of the program the same currently selected. right the white end of the spectrum (3) and information can be found by clicking the The Hints function is an extension to the the center section the midtone values (2). Help or hyperlink associated with the Help system and offers the user a more In a 24-bit image (8 bits per channel) there feature or tool. detailed explanation of the item as well are a total of 256 levels of tone possible H as tutorials related to the tool or menu from black to white – each of these values selected by clicking the More button. is represented on the graph. In version 3.0 of Elements hints are more The number of pixels in the image with contextual and can be found hyperlinked a particular brightness or tone value is with the associated tool or feature. displayed on the graph by height. The higher the spike at any point the more pixels of this value are present in the picture. Please purchase PDF Split-Merge on www.verypdf.com to remove this watermark. www.ElementsA-Z.com 117
CÓ THỂ BẠN MUỐN DOWNLOAD
-
Adobe Photoshop Elements 5.0 A–Z Tools and features illustrated ready reference- P1
 50 p |
  242
|
242
|  56
56
-
Adobe Photoshop Elements 5.0 A–Z Tools and features illustrated ready reference- P2
50 p | 143
| 36
-
Adobe Photoshop Elements 5.0 A–Z Tools and features illustrated ready reference- P4
50 p | 134
| 21
-
Adobe Photoshop Elements 5.0 A–Z Tools and features illustrated ready reference- P6
7 p | 172
| 18
-

Adobe Photoshop Elements 5.0 A–Z Tools and features illustrated ready reference- P5
50 p | 93
| 16


Chịu trách nhiệm nội dung:
Nguyễn Công Hà - Giám đốc Công ty TNHH TÀI LIỆU TRỰC TUYẾN VI NA
LIÊN HỆ
Địa chỉ: P402, 54A Nơ Trang Long, Phường 14, Q.Bình Thạnh, TP.HCM
Hotline: 093 303 0098
Email: support@tailieu.vn
Giấy phép Mạng Xã Hội số: 670/GP-BTTTT cấp ngày 30/11/2015 Copyright © 2022-2032 TaiLieu.VN. All rights reserved.

